With a good excuse of needing bike carrier, my wife gave me a permission to go ahead and order a hitch and bike rack for the highlander. She REALLY didn’t want to have hitch on highlander, but when I gave her an option of buying bike rack for Miata (which I already have a hitch for) and use Miata to carry bikes, vs getting hitch and bike rack for the Highlander, she tool latter..
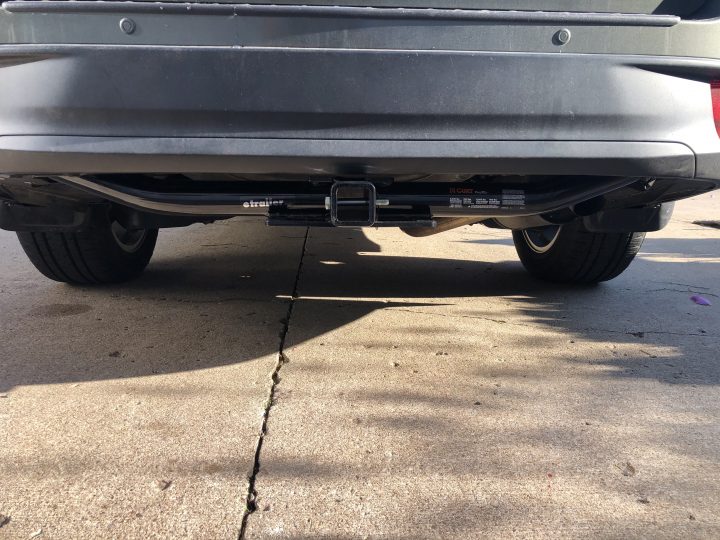
After comparing the price and availabilities online, we ended up with Curt 13200 Hitch and Husky 81145 Bike Rack, with locally sourced receiver.
For the bike rack, I could have gone with Husky 81146, which does not need a separate hitch receiver, but since I found a cheap receiver in the neighborhood, I decided to go with the first one.
.
I ordered the Trailer Hitch from etrailer.com for a better price, and bike carriers from Amazon.com.
The Installation was very straight forward and easy. It came with a step by step instruction with pictures. Having an extra person would help, but I could manage it with a floor Jack and Jacks stand.
A couple tips installing the hitch on Highlander”
- I didn’t jackup the car, as there is enough space for me to lay under the car. That helps when you raise the hitch in place, as a regular floor jack can go high enough to act as a helper hand.
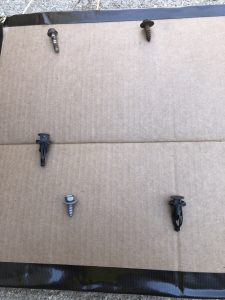
- the plastic under trailer on the driver side (which needs to be removed and re-installed) is held in place with 3 metal screws, and 2 plastic push pins. take picture or remember which screw goes where (it’s not all the same size). Here’s the picture of what I removed, and in it’s order (top toward the front)
- Our Highlander had a very small surface rust where paint was slightly bubbled, I hit it with a grinder to remove the paint and applied Rust Converter (from fixing Miata rust while back), and a left over spray paint. This is a very good time to check under carriage where you may not pay much attention everyday!
- After I fitted the hitch once and bolting up the 4 bolts (except the 2 middle ones), I marked where Hitch is mounted, and removed the excessive caulkings on the frame where interfere. I also spray painted where calk was removed as there were a few scratches on paint from the blade.
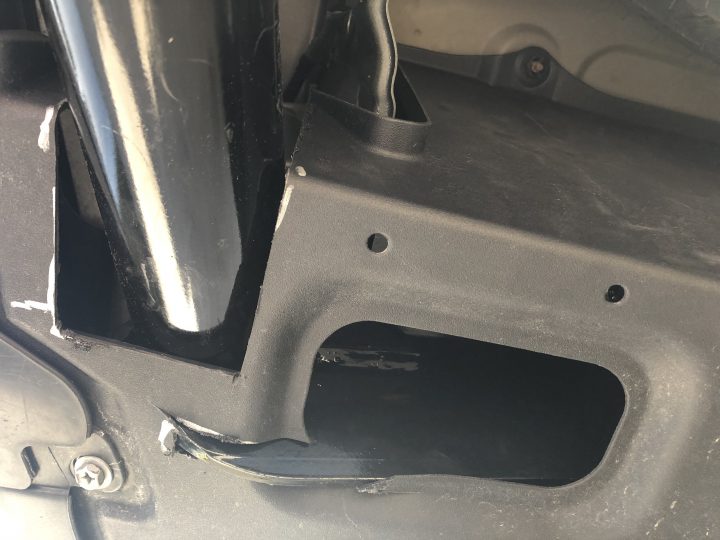
- You don’t have to cut driver side plastic under tray as much as what instruction says. I placed the tray before cutting, and measured and marked where it needs to be cut. Cut little by little. Took me extra time, but result is so much less open spot, where water/salt can splash backup and get it start rusting.
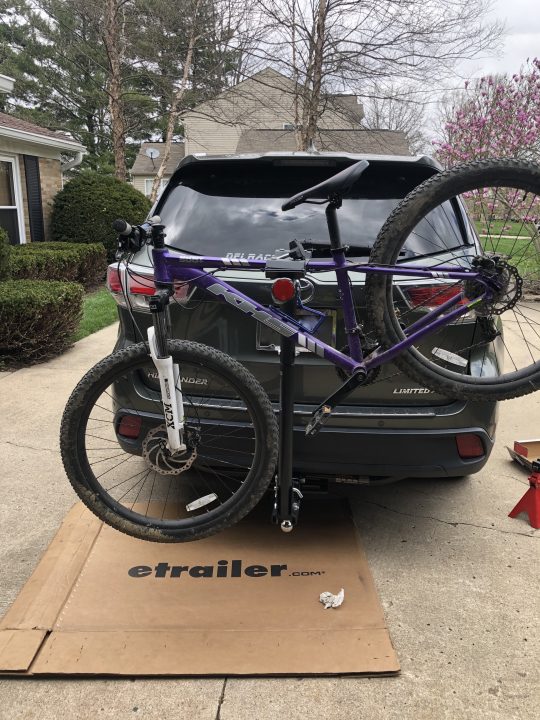
While I was working on the hitch, UPS truck came by and dropped off the Husky Bike Rack.
It came in a tiny box, and the assembly took only a couple bolts. The model I got requires Hitch receiver, and you need to remove the ball once and use the ball and nut (yeah, don’t say anything) to secure the bike rack to the receiver. After thought, Husky 81146 which does not need hitch receiver may worked easier… but oh well 🙂
The Bike rack is very sturdy, and especially for the price, I’m pretty happy about it.
Of course, I only remember to take picture after I test fitted the bike and start unloading…
I’m thinking about making a bike work stand using the bike rack, but that will be an another project for another weekend 🙂