Since the day I bought my Watermelon (the green one), it had a small rust on its rocker panel. One of the common area where rust starts on Miata.
When I repainted her to become Watermelon using Rustoleum, I was going to do the rust repair, but ended up postpone the project mainly because of my procrastination…
Anyhow, I gotta make use of my overkill welder, other than practicing on used brake rotors, and figured one week Christmas break is a good time to start.
There are enough write up on how to repair the rust spot, so this is just for my own record…
Tools:
– Angle Grinder
(I have this Bosch one, but battery operated one like this would be nicer)
– Cutting Wheels
– Flapper Wheels
– Dremel
– Vice Grips
– Hammer (body work hammer would be the best, but I just used good old regular hammer)
– My Overkill Welder, Millermatics 211
– Wet or Dry Sandpaper
– Foam paint brush and roller
– Wife’s old hair drier
Material:
– Painter’s Tape
– Rust Converter
– Cardboard (empty cereal box or something like that…)
– Weld Through Primer
– 18 ha Sheet Metal
– .023 Welding Wire
– Rage Body Filler
– Rustoleum (Primer + your choice of color!)
Steps:
- I forgot to take picture before I start, so this is all I have from while back…
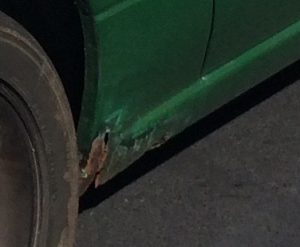
- Clean the area with using flapper wheels on angle grinder, to determine the area need to be replaced. Marking it with sharpie would make it easier
- Use cutting wheels, remove any rusted area. (Straight line makes it easier to make patch panel)
- Check the inside panel for any farther rust damage. If rust is significant, you may need to cut and replace them as well
- Use Flapper wheel and Dremel to expose bare metal around the edge, and to remove any surface rust that you can get to.
- Tape off the area where you will be welding on a new sheetmetal. (Edges inside and outside for butt weld, and anywhere plug weld would happen)
- Apply Rust converter to everywhere you can reach to. I used paper towel soaked in converter and reach as far inside of the panels as possible. Then per instruction on the bottle, applied second coat once it dried, and third just to make sure!
- Remove the tape, and then put new tape to cover just out side of where you’ll weld, and spray the Weld Through Primer.
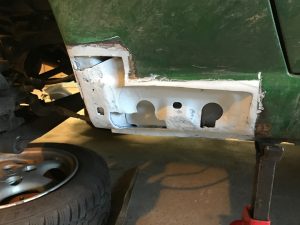
- sand off the primer from the area where you are butt welding (could’ve taped off)
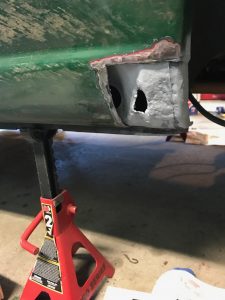
- Use cardboard, make a template for the patch panel. Try to imitate any creases or lips on wheel arches etc.
- Transfer the shape on to the sheetmetal, then use cutting wheel and Dremel to cut the shape out. make 1/8 larger than the template so that there’s room for adjustment
- To bend the sheetmetal, I used vice grip and hand, to make it into ball park shape, and then use hammer to make small adjustment. Use 2×4 on the back so that you won’t make dimpled finish 🙂
- Put against the cut out on rocker panel, and make bends until it is perfectly fit. Once curvature is perfect, trim the edges to the right size. When you bend and hammer the metal, it does expand and contract into the shape, so trim must be after fitment is done.
- Now the fun part. Weld the panel! I used left over piece to practice and also adjusting the wire speed and heat. Remember, this is the first time I actually weld anything meaningful, especially anything this thin…. all I’ve done previously is on brake rotors….
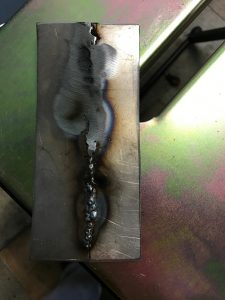
- Once welder is set, tack weld the patch panel. I started from a corner, and slowly weld it in. And I screwed… the passenger side panel got pushed behind and when I noticed it was too late to fix… I tried to add beads to fill, but eventually I gave up and decided to use filler… So went ahead and grind down the bead.
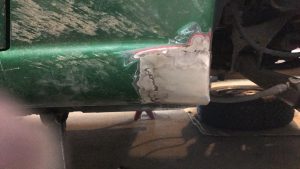
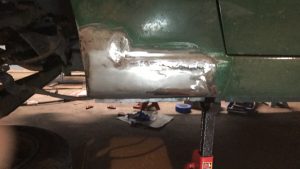
- I grind down to as smooth as possible, and then used 600 grid sand paper to smooth out the surface.
- Mix Body filler and the harder per direction, and then apply to the pane. I used Rage brand based on recommendation from my friend. He said it is a good stuff with longer fiber which gives more strength compare to bonds etc.
- I figured I suck at putting body filler nice and smooth, so I basically apply a lot and then sanded down.
- Apply Rustoleum Primer (or regular paint primer if you are not going to the Rustoleum route…)
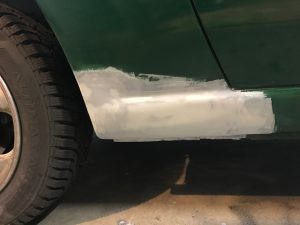
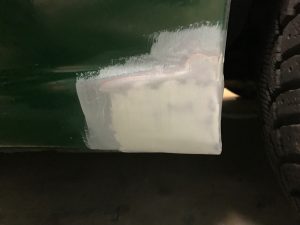
- Wet sand and then start applying Rustoleum color of choice 🙂 I mix with mineral spirits to thin it down and then apply very light coat, while blowing with a hair drier to remove any bubble. Apply another coat after 12 hours, wait 24 hours and then wet sand. Apply 2 more coat, wet sand. and repeat… This is after very first coat.
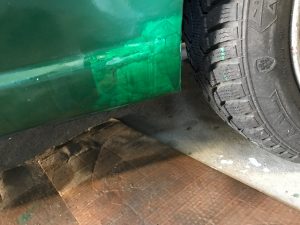
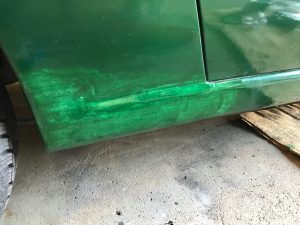
For someone who’ve never done any body welding, this ended up not too bad…
I will continue adding more coat of paint through out this week (since I can only add one coat a day, it’ll take a whole week to get 7-8 coats needed), and I’ll post another final picture once I finish this whole project.
I can weld in some new metal if you like.
it’s not pretty, but all done now 🙂
Looks like a fun project. Great work!
Nicely done!