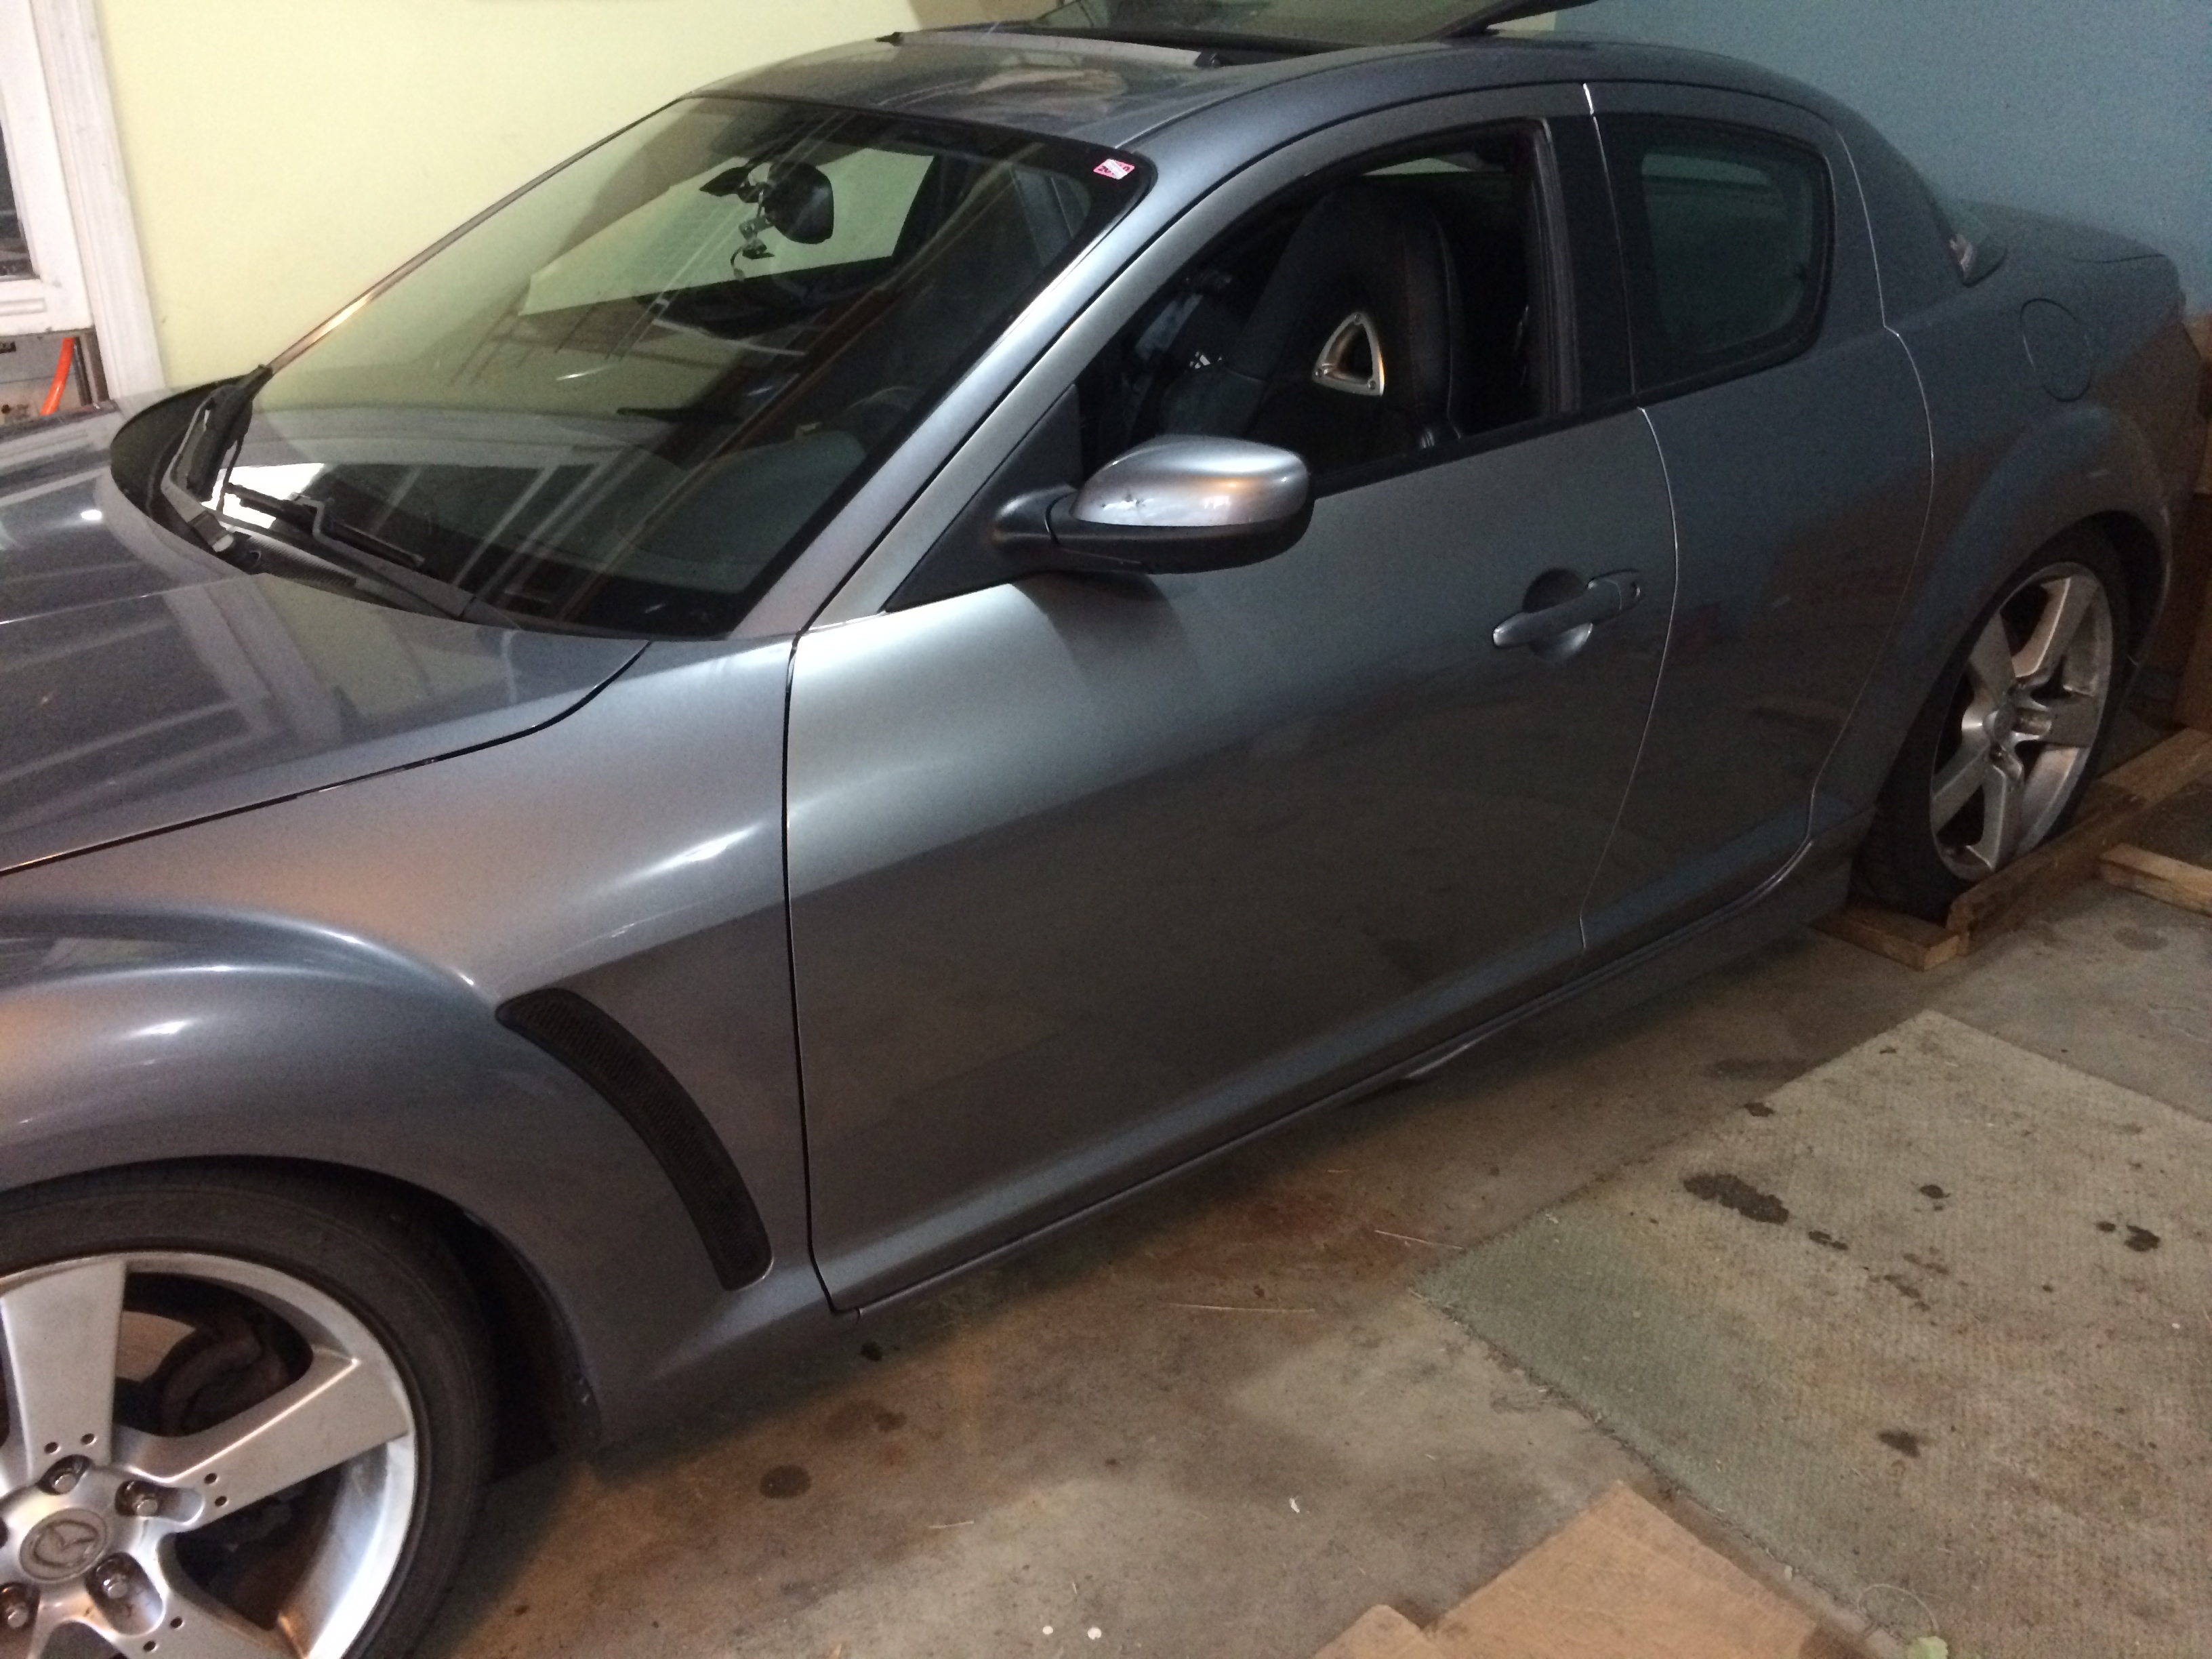
A little while back, before I decided to make my 2 car garage into 3 car garage, I was parking my RX-8 outside, and shuffling around the car depending on what I take out that day.
With a little carelessness, and next thing I know was I bumped into my RX-8 with Highlander. damn.
I took the interior panel and inner panel (where speaker, window motor etc mounted) out, and then tried pounding the dent out… but well, no good. Luckily it was purely cosmetic, and all I had is a little rattle when I go over a bump, so I decided to drive around with it for the time being.
I figured that it will cost me at least $300 to get the dent repaired, and re-painted, plus it will be heavier with filler etc, I will look around junk yard for the replacement, in same color.
After several month of waiting and searching, I finally came across one not too far from me, looks decent in picture, same color, and priced just around $300. (originally they said $300 plus tax, but ended up less than $300 with tax).
Unfortunately when I brought it back and installed, it is obviously faded more than my car is and not so color matched, but.. oh well, no dent, and it’s close enough. I just need to keep my car dirty…. 🙂
I forgot to take pictures as always, so here’s some tutorial for door swapping tutorial without pictures…
Tools needed
- 10mm Socket
- Extension for the socket
- ratchet
- Electric drill (optional, make it easier to remove bolts and nuts)
- Philips Screw driver (Long one)
- Needle Nose Plier
- 8-10″ long 2×4 or something to hold the window in place
Removing Interior Panel
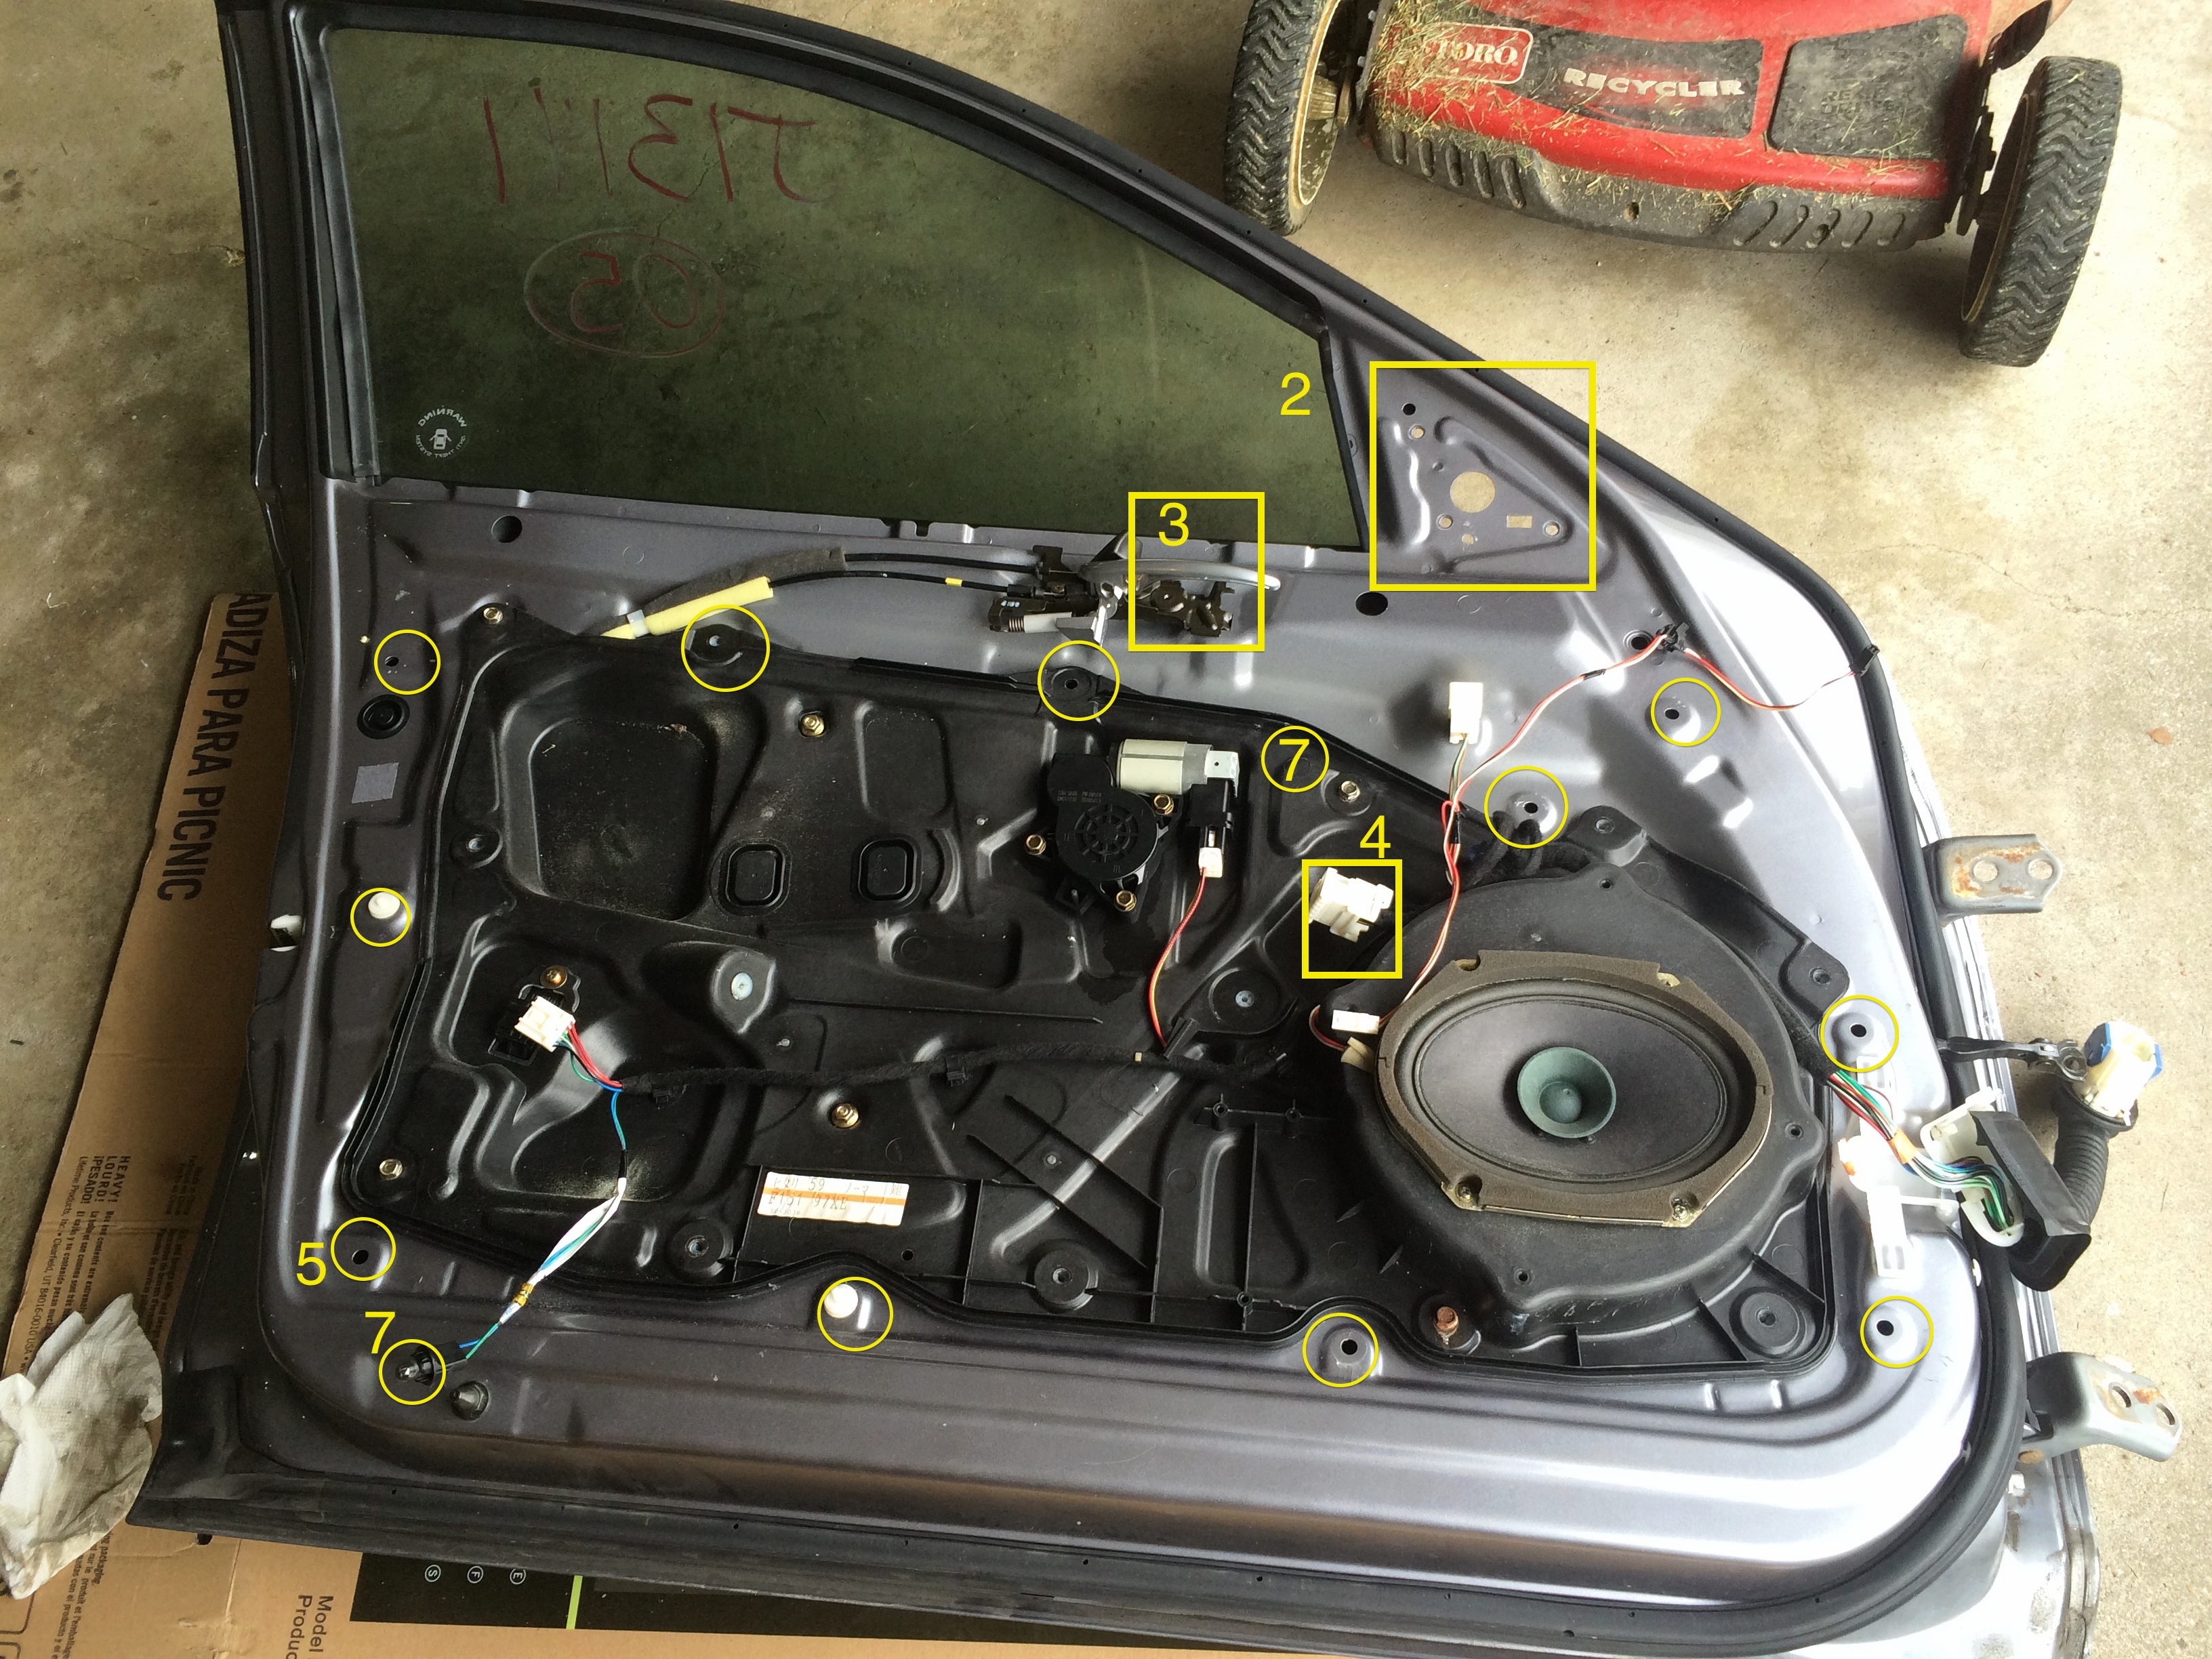
- lower the window just a little. about 2 inches is good enough.
- Remove Tweeter (Black triangle piece by the window): Pop out the clip on the window side, and pull back toward window to remove. Then disconnect the wire.
- Pop out the screw cover behind door handle, and remove screw (Philips)
- Pop out the switch panel for the window and door lock. (push up the lower side first), then disconnect two connector on its back
- Starting from left bottom corner, pull the interior panel to pop off the clips (The yellow circles are the clips.) Be firm but gentle, it can break. (#5, and other circles without numbers)
- Once all clips are popped off, push up the interior panel up to unhook from the window edge
- There are two wires need to be disconnected. One is the light bulb at the bottom, and another just above the switch panel (I couldn’t locate in this picture, but somewhere around #7 circle…)
Removing Inner Panel
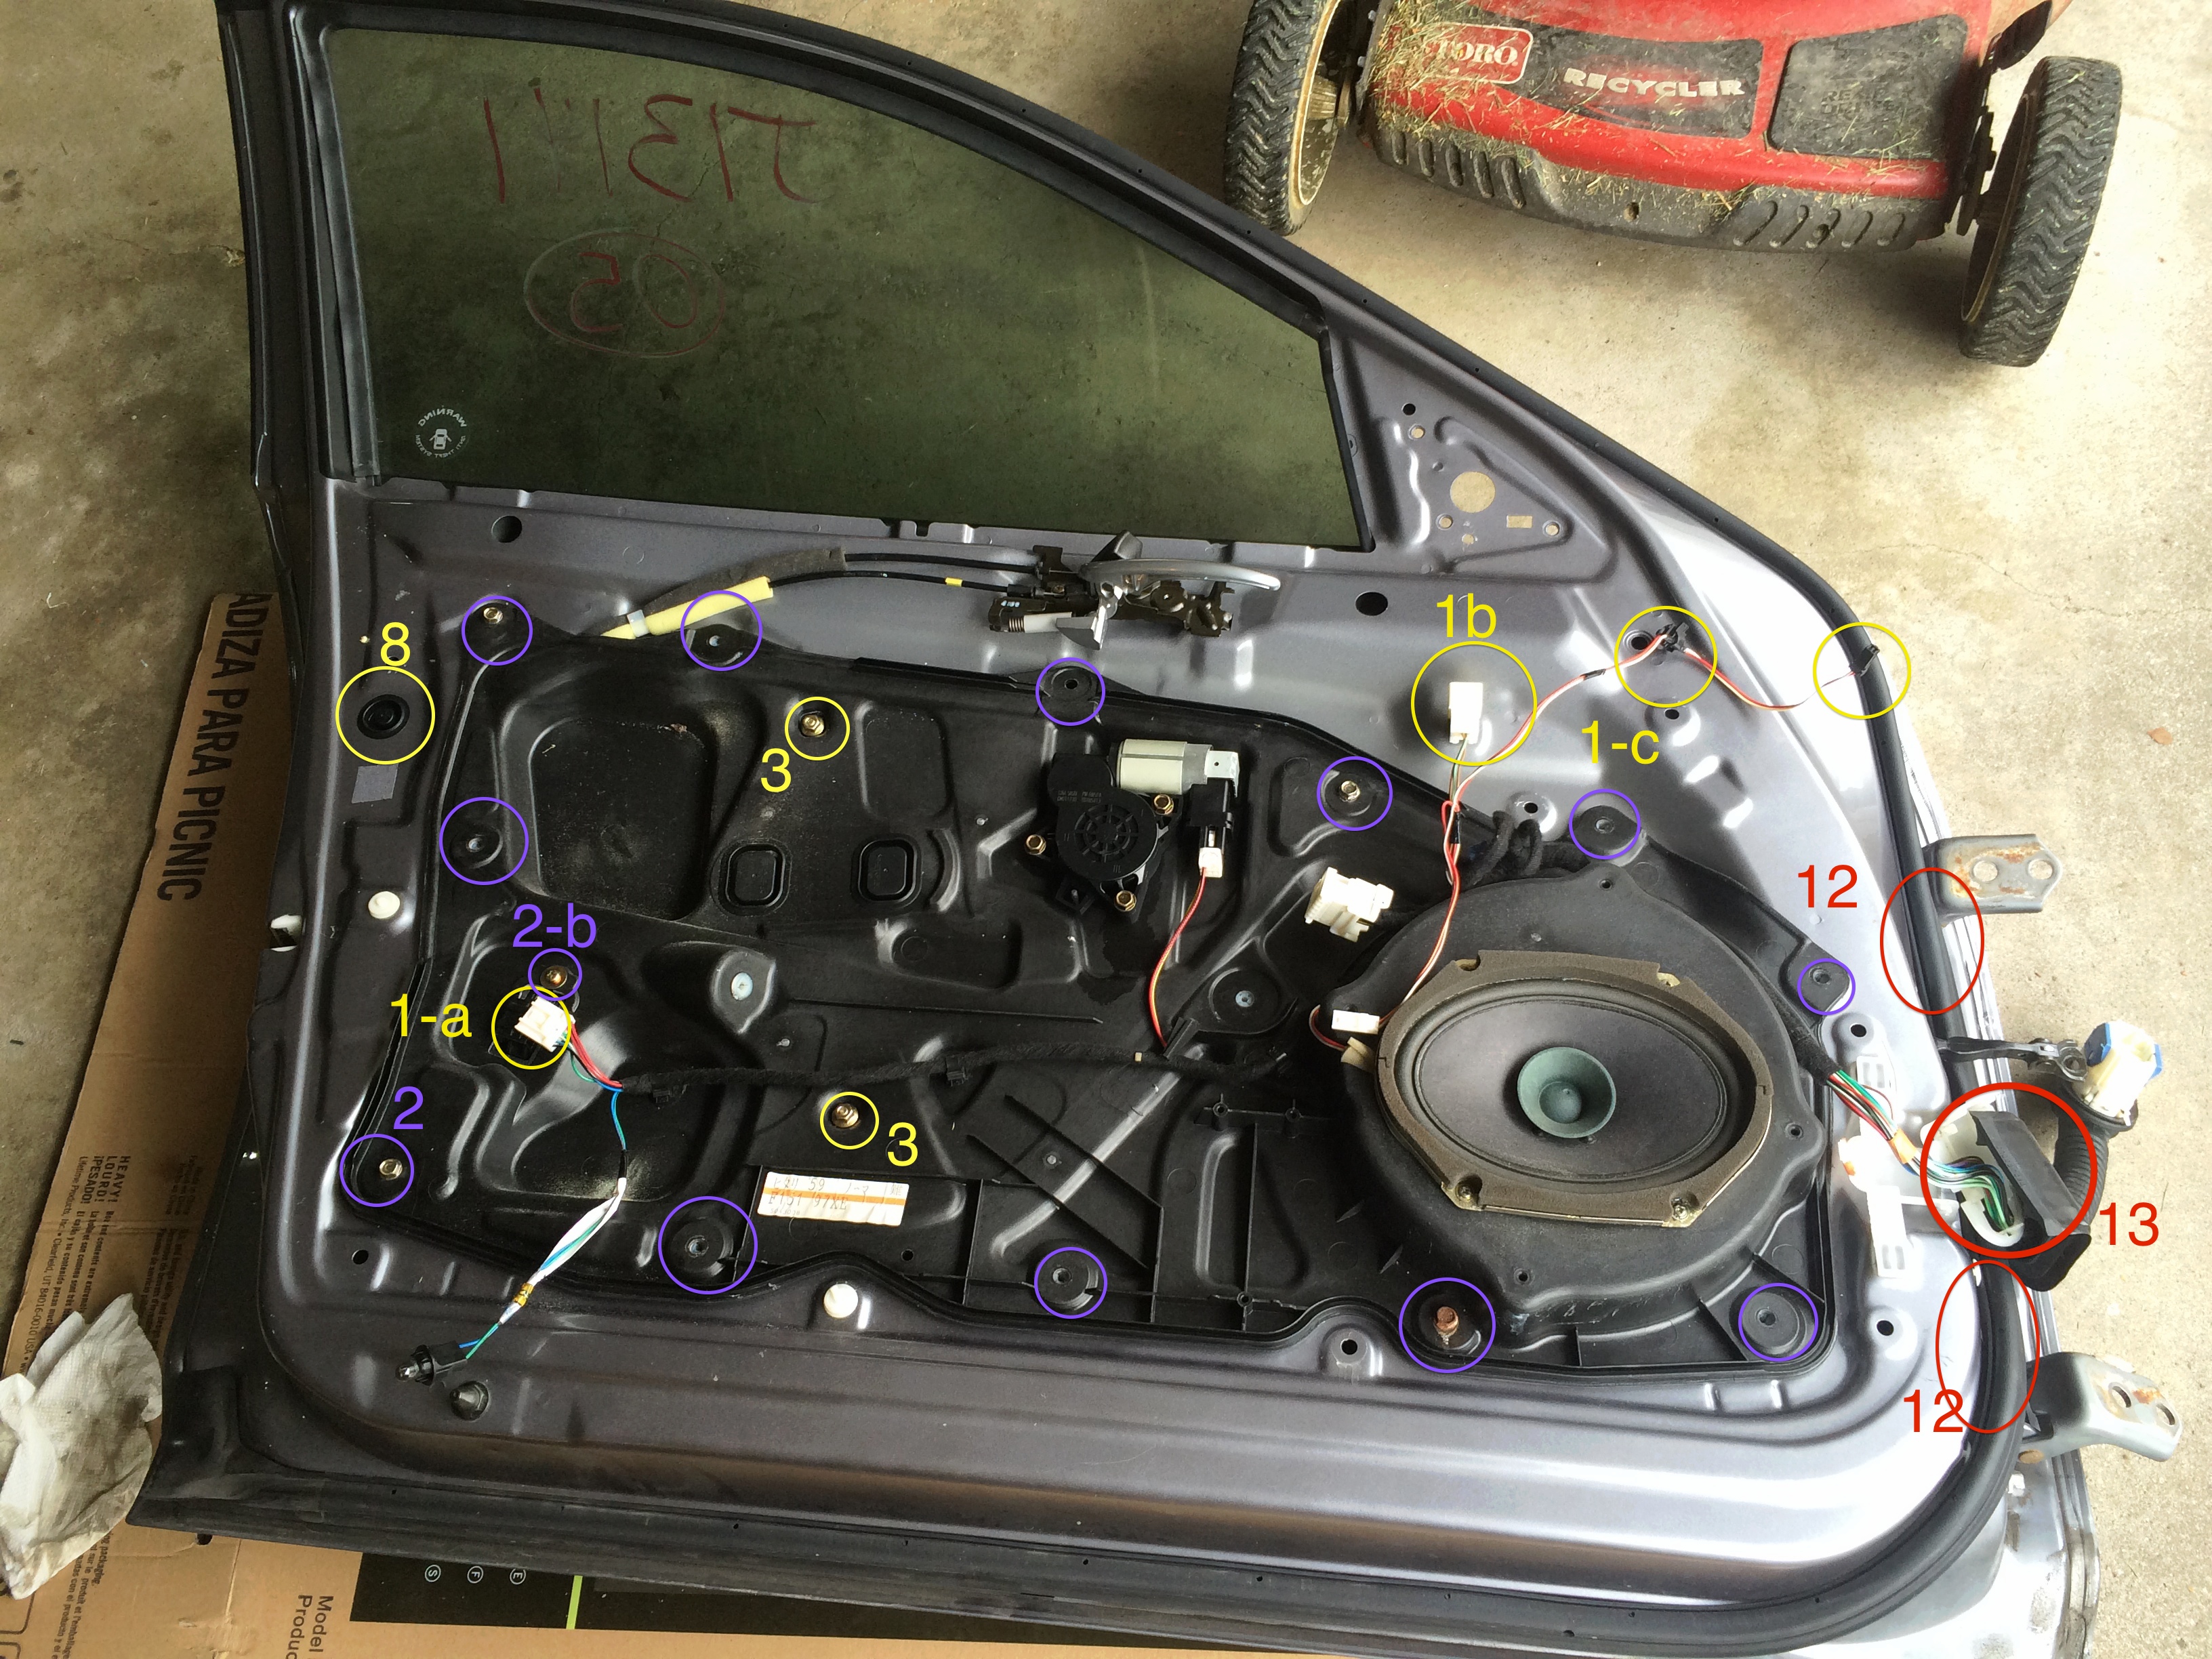
- Disconnect wires and clips – Door lock actuator(1-a), Heated door mirror(1-b), tweeter (1-c, if not disconnected), and if you are doing the full door swap unclip the whole wire bundle from the inner panel
- Remove bolts (10mm) holding the inner panel (2-a and other blue circles), and one philips screw on door actuator (2-b). At this point, the inner panel is help only by the glue on its back, so be careful not to drop it.
- Slowly ply off the inner panel from the exterior panel toward you. Remember, the window is still connected to the inner panel behind the 2 nuts (3). Once inner panel is off from the ext. panel, pull the inner panel toward you and lower a little; the window will lower as you lower the inner panel.
- With inner panel semi-detatched, peak behind the inner panel, and place a 2×4 under the glass to keep it from dropping.
- Remove two nuts holding the window rail (3), and carefully lower the inner panel down.
- There are two bolts holding window glass to the rail. Remove them and now you can set the inner panel off
- Remove the 2×4 while holding the glass, tilt the glass forward and pull up toward the top to remove the glass
- Remove the grommet (8), to access the key cylinder (only on driver side)
- There are two metal arm held by plastic cover connoting between key cylinder to the actuator, and door handle to the actuator. Flip the plastic cover to free the arm.
- Using 10mm socket with extension, carefully remove the bolt holding the cylinder. If you look inside the grommet, you’ll see the bolt head. Do not drop the bolt!!!
- Twist the key cylinder clockwise to remove
- Carefully detach the weather seal from the door panel (12) just above and below the wire bundle
- Ply off the Rubber cover and Plastic cap (13) holding the wires to the door panel, then pull behind the weather seal
- Remove two bolts on each hinge, and also 2 bolts on black arm in the middle. Undo the 2 on arm first, and then one each from the hinge, and while someone else holding the door, remove the rest.
Putting back the door is just in reverse order.
you can remove/attach the inner panel while the door is off the car, but I found it easier doing everything while it is on the door, so it’s set vertically.
the tricky part is handling the window glass. By opening the window a little, it will give a space to remove the two screws holding the glass to the rail. if you open the window too much, you will have less room to move the inner panel down.
If you have disconnected the power etc already and already at the point it takes too much time to go back, you can remove the window motor that held by the 3 bolts. However, it is not that easiest thing to put back while holding the window’s weight, and also may get grease all over… I’ve done it this way first time, and it’s doable, but easier if you could remember to lower the window a bit…
Finally just for the reference, here’s the picture of the Grand touring’s inner panel.

One I bought from junk yard was the one for the base model, which does not have bose speaker and amp.
Also, this was before I figured out what I should remove and what not, so some of the items are undone though it was not necessary… (door handle, amp, etc..)
Anyways, it is not really hard, just be patient and careful not to break things. It is easier if you could use another pair of hand to hold the parts in place while you screw some of the items. (holding window while undo bolts, door panel while removal, etc). Also though it’s not necessary, using electric drill will make undo bolts/nuts much quicker. When I bolt things back on, I set it to the softest setting on the drill so that it won’t strip the plastic backing, and then use hand tool to tighten a little more.